Press the
button
to change its text.
A button is an example of an
input control.
Every input control should be at least
48dp
× 48dp, and Android wants buttons to be ALL UPPERCASE
(see
Style
and
android:textAllCaps).
The button won’t do anything
unless we plug a
listener
object
into it.
The
onCreate
method of our
MainActivity
creates a listener and implants it into the
button.
Our listener is a
MyOnClickListener.
It implements the interface
View.OnClickListener,
which is one of the types of listener that can be put into into a button.
The
onClick
method of our listener
overrides
the abstract method
onClick
of
View.OnClickListener.
MainActivity.java
contains the new class
MyOnClickListener
as well as the old class
MainActivity.
MyOnClickListener
can be defined in this
.java
file because it is not a public class.
The string literal in
"double
quotes"
should have been
string
resource
in
strings.xml,
but I was lazy.
activity_main.xml.
I replaced the
TextView
in the
RelativeLayout
with a
Button.
I added the attributes
android:id="@+id/button",
android:layout_centerInParent="true",
and
android:textAllCaps="false"
to the
Button.
strings.xml.
I added a
string
resource
named
button_text.
R.java
creates the
int
variables
R.layout.activity_main
and
R.id.button.
AndroidManifest.xml.
build.gradle
(Module: app)
android.widget.Button
platform_frameworks_base/core/java/android/widget/Button.java
source code on GitHub
ApiDemos/src/com/example/android/apis/view/Buttons1.java
Buttons1
is a subclass of class
Activity.
ApiDemos/res/layout/buttons_1.xml
LinearLayout
containing two
Buttons
and a
ToggleButton.
For the question mark in the
style="?android:attr/buttonStyleSmall"Button,
see
Referencing
style attributes
and
Styles
and Themes.
ApiDemos/res/values/strings.xml
contains three
string
resources:
buttons_1_normalbuttons_1_smallbuttons_1_toggle.
This string is not displayed by the
ToggleButton.ApiDemos/src/com/example/android/apis/view/Controls1.java
Controls1
is a subclass of class
Activity.
ApiDemos/res/layout/controls_1.xml
LinearLayout
containing two
Buttons
and a
ToggleButton.
For the question mark in the
style="?android:attr/buttonStyleSmall"Button,
see
Referencing
style attributes
and
Styles
and Themes.
ApiDemos/res/values/strings.xml
contains three
string
resources
ApiDemos/AndroidManifest.xml
gives a different
android:theme
attribute to the activities
view.Controls1,
view.Controls2,
etc.
ApiDemos/src/com/example/android/apis/view/ImageButton1.java
ImageButton1
is a subclass of class
Activity.
ApiDemos/res/layout/image_button_1.xml
LinearLayout
containing the
ImageButtons.
sym_action_call.png,
sym_action_chat.png,
and
sym_action_email.png
are in the directories
~/Library/Android/sdk/platforms/android-23/data/res/drawable-ldpi,
-mdpi,
-hdpi,
and
-xhdpi.
onClick
method of the
MyOnClickListener
cannot create a piece of
Toast,
because it has no
Context
(such as an
Activity
object)
that it can pass to
Toast.makeText.
To fix this,
let the listener class be an anonymous inner class
(i.e., a nameless nested class)
inside of the
onCreate
method class
MainActivity.
Remove the existing class
MyOnClickListener
and change the
onCreate
method to the following.
Since the listener class is non-static, it can say
MainActivity.this.
@Override
protected void onCreate(Bundle savedInstanceState) {
super.onCreate(savedInstanceState);
setContentView(R.layout.activity_main);
Button button = (Button)findViewById(R.id.button);
View.OnClickListener onClickListener = new View.OnClickListener() {
@Override
public void onClick(View v) {
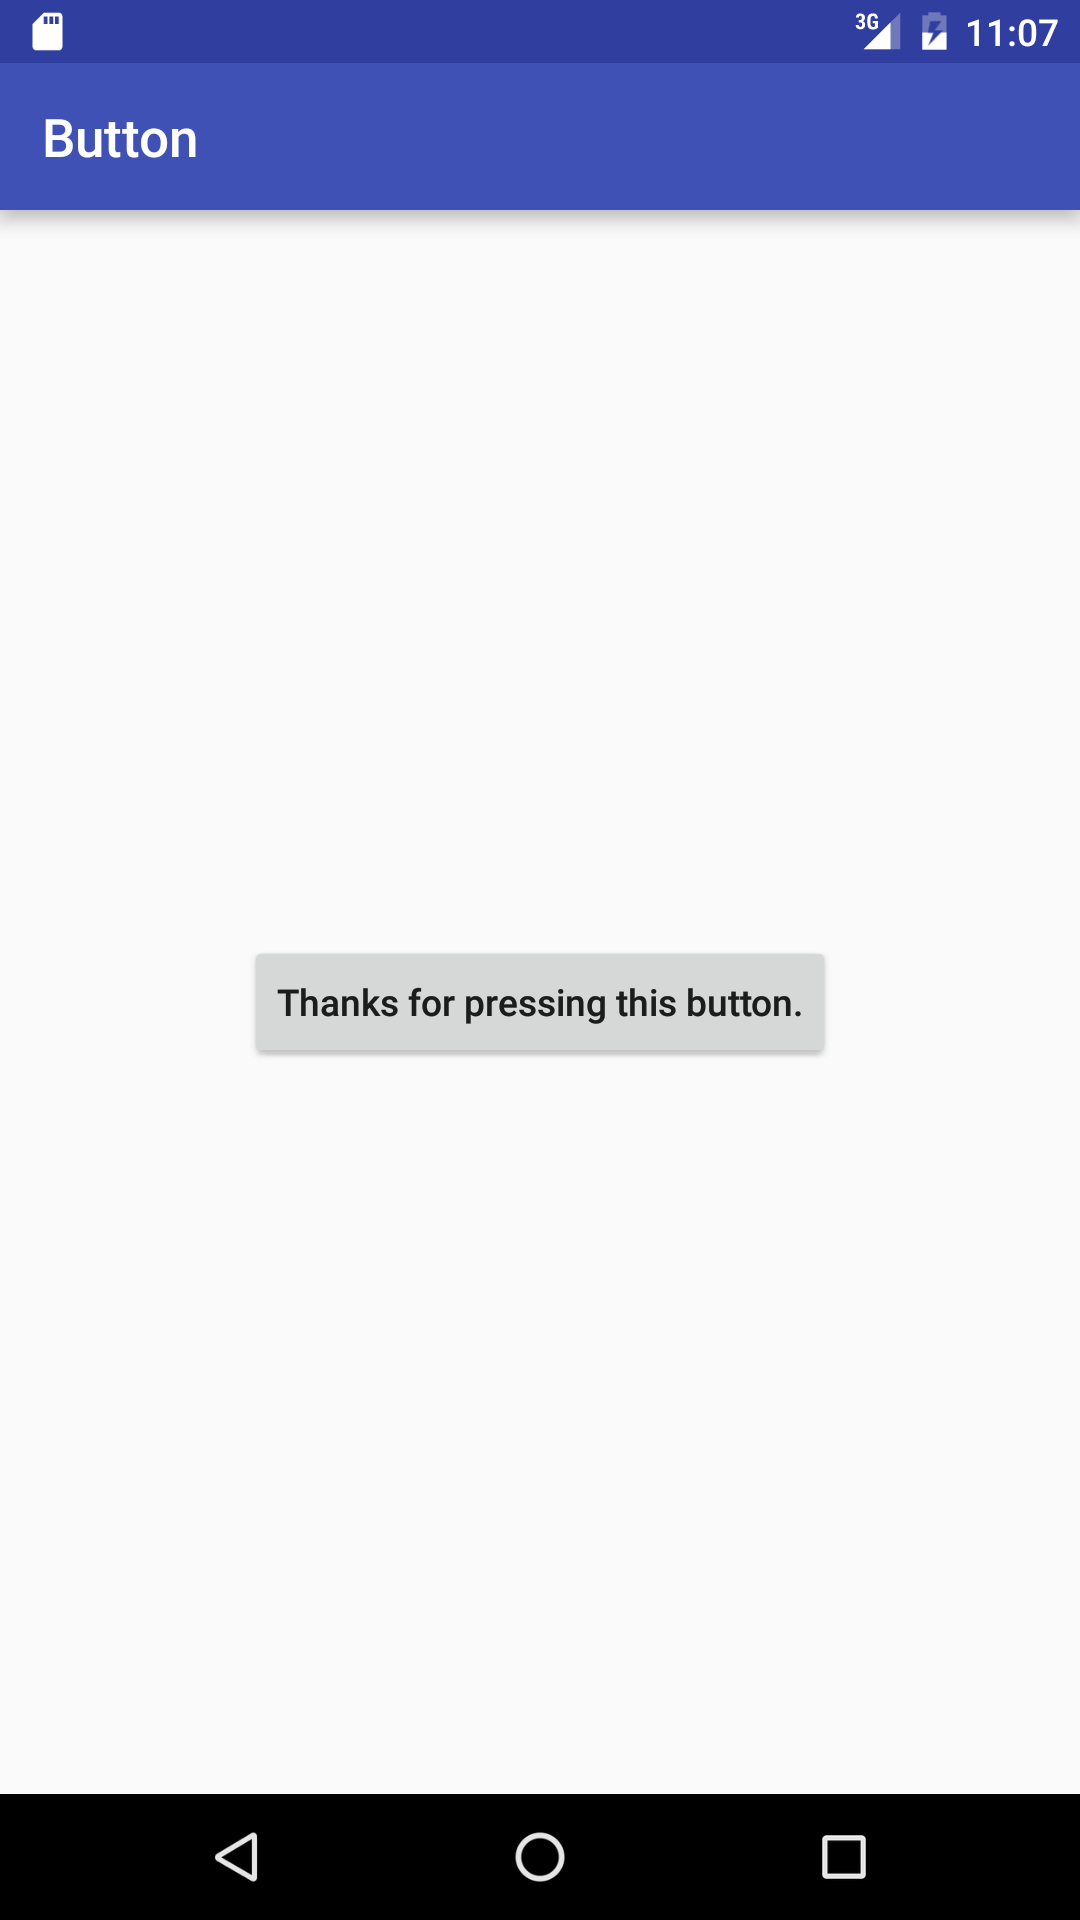
Button button = (Button)v; //downcast
button.setText("Thanks for pressing this button.");
Toast.makeText(MainActivity.this, "Thanks.", Toast.LENGTH_LONG).show();
}
};
button.setOnClickListener(onClickListener);
}
onCreate
method of class
MainActivity
to the following.
    @Override
    protected void onCreate(Bundle savedInstanceState) {
        super.onCreate(savedInstanceState);
        setContentView(R.layout.activity_main);

        Button button = (Button)findViewById(R.id.button);

        button.setOnClickListener(new View.OnClickListener() {
            @Override
            public void onClick(View v) {
                Button button = (Button)v;	//downcast
                button.setText("Thanks for pressing this button.");
                Toast.makeText(MainActivity.this, "Thanks.", Toast.LENGTH_LONG).show();
            }
        });
    }
Activity
and the
View.OnClickListener
were two separate objects.
Combine them into a single object which will do the work of both.
Change class
MainActivity
to the following.
It’s faster and smaller,
and it makes it easier for the listener to access the fields of the
Activity
(because the listener
is
the
Activity).
The other objects in the app might appreciate a listener that is a big,
stable, publicly visible object.
The downside is that the
Activity
will always be stuck with the same
onClick
method.
public class MainActivity extends AppCompatActivity implements View.OnClickListener {

    @Override
    protected void onCreate(Bundle savedInstanceState) {
        super.onCreate(savedInstanceState);
        setContentView(R.layout.activity_main);

        Button button = (Button)findViewById(R.id.button);
        button.setOnClickListener(this);
    }

    @Override
    public void onClick(View v) {
        Button button = (Button)v;	//downcast
        button.setText("Thanks for pressing this button.");
        Toast.makeText(this, "Thanks.", Toast.LENGTH_LONG).show();
    }

}
Activity
object.
Change
activity_main.xmlid
is first mentioned,
it must be created with a plus sign.
At each subsequent mention of the
id,
do not write a plus sign.
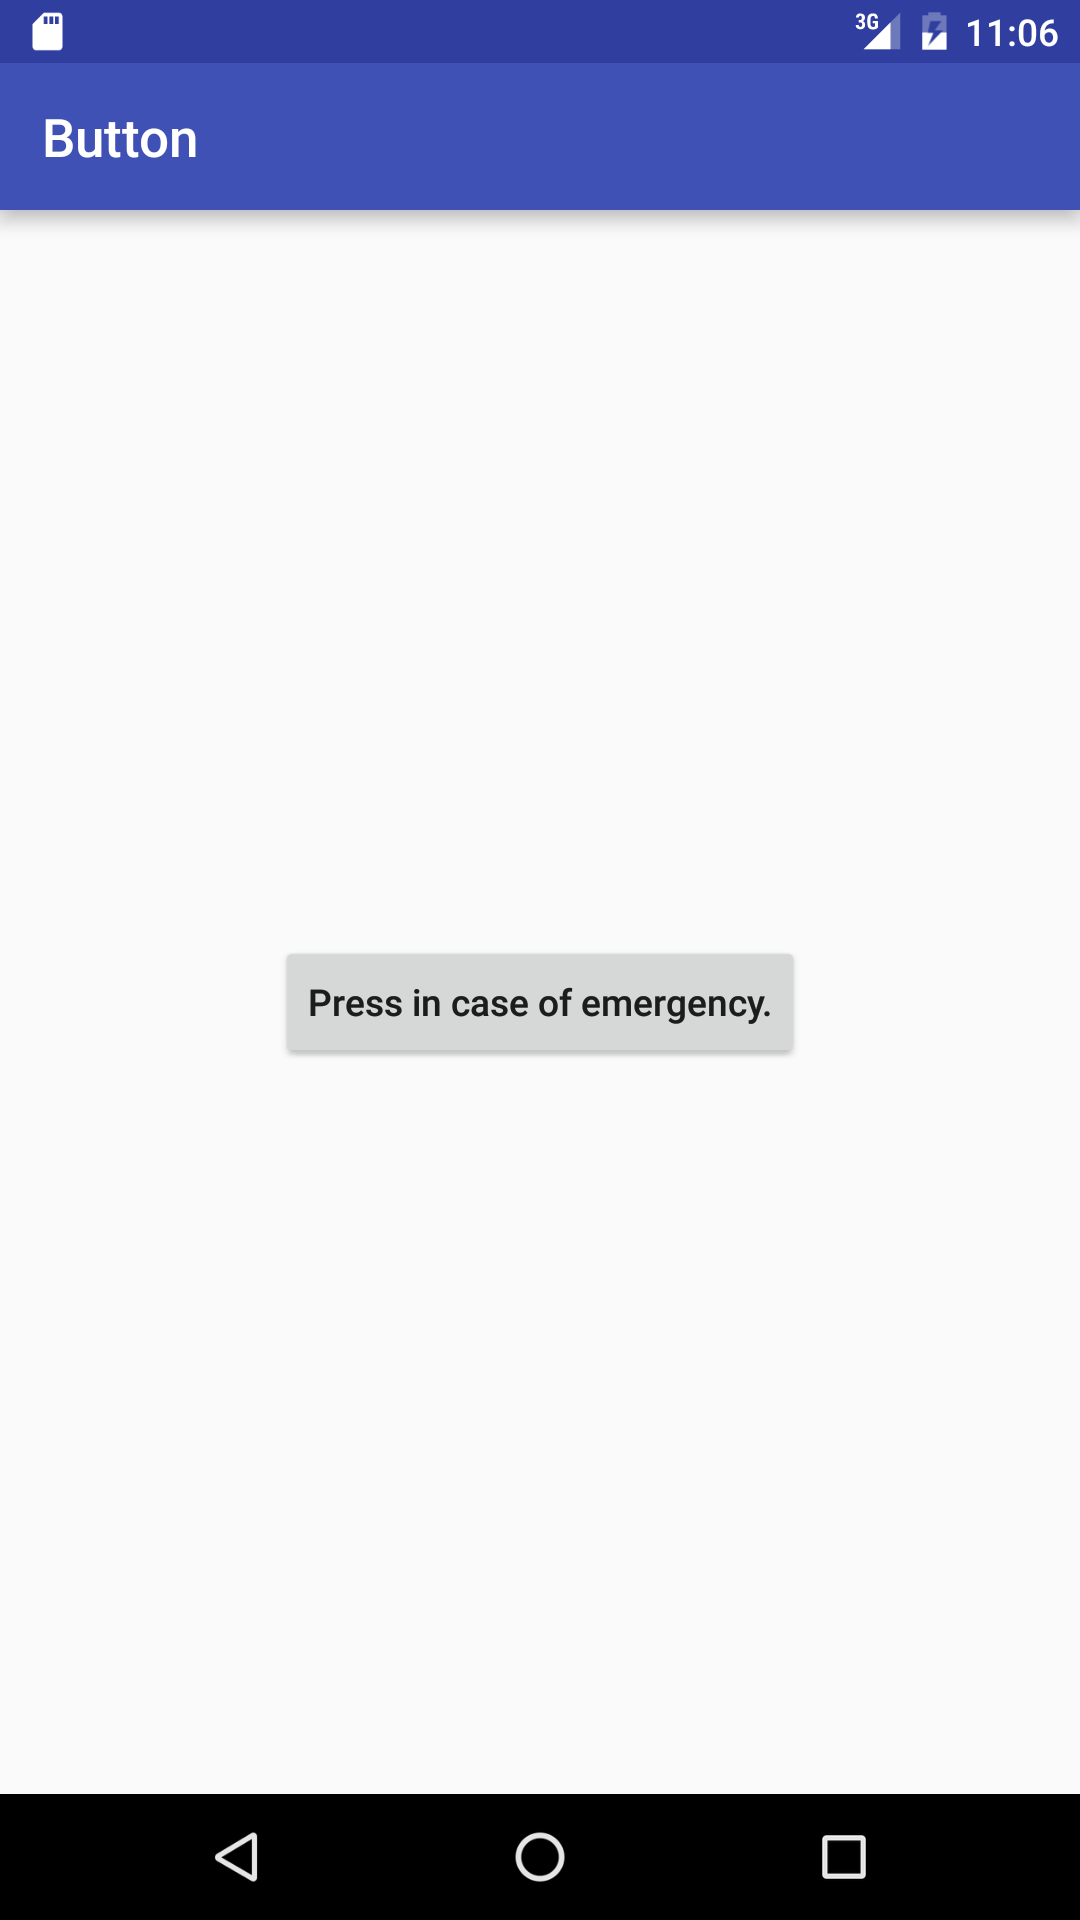
<RelativeLayout xmlns:android="http://schemas.android.com/apk/res/android"
    xmlns:tools="http://schemas.android.com/tools"
    android:layout_width="match_parent"
    android:layout_height="match_parent"
    android:paddingBottom="@dimen/activity_vertical_margin"
    android:paddingLeft="@dimen/activity_horizontal_margin"
    android:paddingRight="@dimen/activity_horizontal_margin"
    android:paddingTop="@dimen/activity_vertical_margin"
    tools:context=".MainActivity" >

    <Button
        android:id="@+id/button0"
        android:layout_centerInParent="true"
        android:layout_width="wrap_content"
        android:layout_height="wrap_content"
        android:textAllCaps="false"
        android:text="Press in case of emergency" />

    <Button
        android:id="@+id/button1"
        android:layout_below="@id/button0"
        android:layout_centerHorizontal="true"
        android:layout_width="wrap_content"
        android:layout_height="wrap_content"
        android:textAllCaps="false"
        android:text="Press when all clear" />

</RelativeLayout>
onClick
can examine the text of the button
to tell which button was clicked:
public class MainActivity extends AppCompatActivity implements View.OnClickListener {

    @Override
    protected void onCreate(Bundle savedInstanceState) {
        super.onCreate(savedInstanceState);
        setContentView(R.layout.activity_main);

        Button button0 = (Button)findViewById(R.id.button0);
        button0.setOnClickListener(this);
        Button button1 = (Button)findViewById(R.id.button1);
        button1.setOnClickListener(this);
    }

    @Override
    public void onClick(View v) {
        Button button = (Button)v;
        CharSequence charSequence = button.getText();
        String string = charSequence.toString();
        String[] words = string.split("\\s+");	//white space
        String lastWord = words[words.length - 1];

        if (lastWord.equals("emergency")) {
            Toast.makeText(this, "Remain calm.", Toast.LENGTH_LONG).show();
        } else {
            Toast.makeText(this, "You can relax now.", Toast.LENGTH_LONG).show();
        }
    }

}
android:textAllCaps
attribute from the
Button
element in
activity_main.xml?
What sinister force is trying to set the text to all caps?
Button’s
text.
Add the following field to the
View.OnClickListener
class.
boolean toggle = false;
Then change the
setText
to
                toggle = !toggle;		//exclamation point means "the opposite of"
                button.setText(toggle ? "odd" : "even");
res/values/strings.xml.
Add the following
string
resource
to that file.
setText
will accept any
CharSequence,
including the
String
returned by
getString.
<string name="button_thanks">Thanks for pressing this button.</string>
In
onClick,
change the call to
setText
to the following.
button.setText(getString(R.string.button_thanks));
activity_main.xml
install the listener into the
Button.
In this case, the listener will have to be the
Activity
object,
and the
Activity
object does not need to
implement the interface
View.OnClickListener.
Add the following attribute to the
Button
element.
android:onClick="onClick"
    //No @Override.
    public void onClick(View view) {
        Button button = (Button)view;	//downcast
        button.setText(getString(R.string.button_thanks));
    }
Button
move us to a new screen.
First, create the file
second_screen.xml
in the folder
app/res/layout,
which already contains the file
activity_main.xml.
In the
Android Studio
project
view,
select the folder
app/res/layout.
Pull down
LinearLayout
(or
RelativeLayout,
whichever one you want)
second_screen.xml
to contain the following.
<?xml version="1.0" encoding="utf-8"?>
<LinearLayout
    xmlns:android="http://schemas.android.com/apk/res/android"
    android:layout_width="match_parent"
    android:layout_height="match_parent"
    android:orientation="vertical">

    <TextView
        android:layout_width="wrap_content"
        android:layout_height="wrap_content"
        android:text="Second screen"/>

</LinearLayout>
The method that is called when we press the
Button
should say
setContentView(R.layout.second_screen);