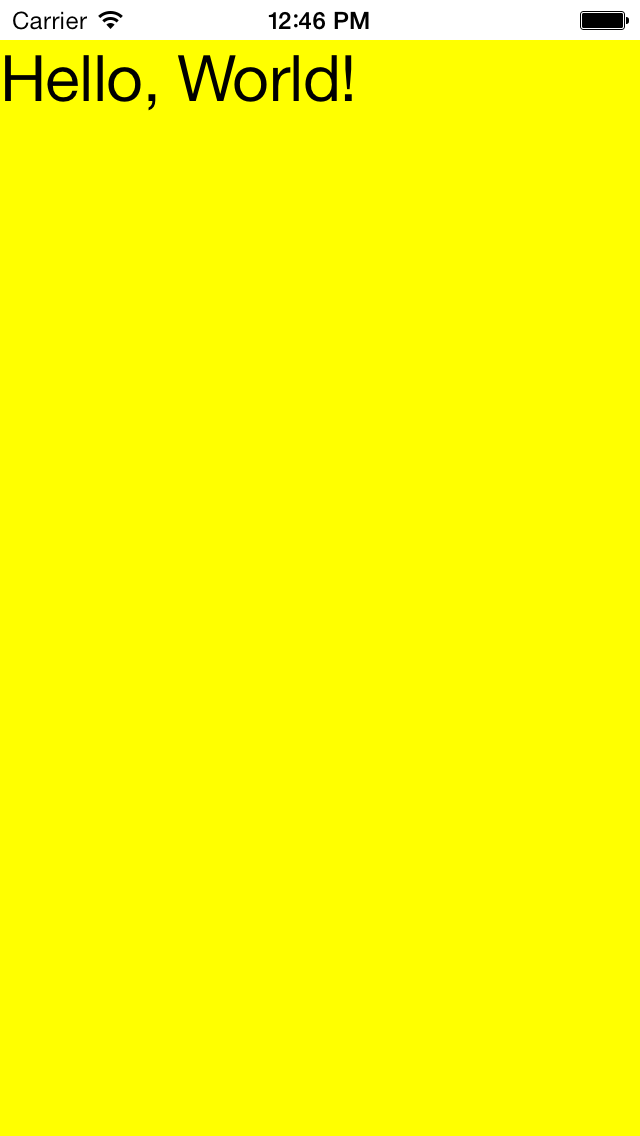
To get the above screen shot,
I selected
Hello > iPhone Retina (4-inch 64-bit)
in the upper left corner of Xcode.
Then when the app was running, I pulled down the iOS Simulator’s File
menu and selected Save Screen Shot.
It created a png file of 640 × 1136 pixels named
iOS Simulator Screen shot
on my Mac desktop.
In the web page you are reading now,
I scaled the png file down to 320 × 568
and added a black outline so you could see the white status bar.
The
window
of this app is created by the
application delegate,
not by a
MainWindow.xib
file.
The window contains a rectangular yellow
view,
into which we will
draw
some text at a given point with a given dictionary of attributes.
(In iOS 6 and earlier,
the method
drawAtPoint:withFont:
was used instead of
drawAtPoint:withAttributes:.)
We will have to write two classes:
UIApplicationDelegate
protocol.UIView.
The class of the application object
(class
UIApplication)
and the class of the window object
(class
UIWindow)
have already been written for us.
To open the project in Xcode,
download the
Hello.zip
file,
click on it,
open the
Hello
folder,
and
double-click on the
Hello.xcodeproj
file.
Then press the Run button in the upper left corner of Xcode.
The
Hello.zip
file contains the following files (plus many others).
main.mHelloAppDelegateViewHelloAppDelegate.hHelloAppDelegate.m.view
instance variable to class
HelloAppDelegate
in
HelloAppDelegate.h.@class View;HelloAppDelegate.h#import "View.h"HelloAppDelegate.m.window
property
of class
HelloAppDelegate
is never used by any other class.
But we’ll leave it in
HelloAppDelegate.h
The text in the iPhone status bar is black.
(This text includes the current time.)
application:didFinishLaunchingWithOptions:window’s
backgroundColor
to
white
in order to make this text visible.
The window defaults to black,
which would make the text impossible to see.
View.
If the list of files in the Project Navigator (the left pane of Xcode)
is not visible,
Hello
folder in the Project Navigator.
View.hView.mHelloAppDelegate.hHelloAppDelegate.m.View.hView.mdrawRect:
method.
A
function
is a section of the program.
The
main.m
file contains one function named
main.
The file was written for you automatically by Xcode.
The
body
of the function is the group of the statements enclosed in
{curly braces}.
The name of the function
(main)
is written in front of the parentheses
in front of the opening curly brace.
The data type of the return value
(int)
is written in front of the name of the function.
This function is not a method of any object. It is an orphan that belongs to no object. We indicate this by not writing a plus or minus in front of the data type of the return value.
argc
and
argv
are relics from the days when a program was launched by typing a
command line with
arguments
in respose to a prompt.
We haven’t done this in years.
We are going to launch our app by tapping on an icon.
The value returned from the main function is a relic from the days when a program terminated by returning to the command line and gave you another prompt. We are not going to do this either. We are going to terminate our app by pressing the Home button on the iPhone.
Don’t do anything with
argc,
argv,
and the return value.
Just leave them there and don’t touch them.
If you did want to play with
argc
and
argv
in Xcode,
Product →
Scheme →
Edit Scheme… →
Arguments →
Arguments Passed on Launch.
and add the arguments individually.
Then in the
main
function you could print the number of arguments and the arguments themselves:
	//includes name of executable file
	NSLog(@"Number of arguments == %d", argc);

	//argv[0] is the name of the executable file of the app
	for (int i = 0; i < argc; ++i) {
		NSLog(@"argv[%d] == %s", i, argv[i]);
	}
The
main
function performs the tasks that any Objective-C program would have to do.
The
UIApplicationMain
function performs the tasks that only an app would have to do.
There has to be a
main
function.
Every program in the languages
C,
C++,
Objective-C,
Go,
etc.,
begins its execution at the start of the
main
function.
The
main
function is the program’s interface with the operating system.
An app can do two or more things at the same time.
In other words,
an app can have two or more
threads
and must have at least one.
The
main
function is executed by the app’s main thread,
which for the time being will be our app’s only thread.
Every thread has to have an
autorelease
pool,
so the
main
function creates and destroys this object
with an
@autoreleasepool
block.
The
main
function also calls the function
UIApplicationMain.
This function has already been written for us.
We never see its body.
It creates two objects,
the
application
and the
application
delegate,
and sets them in motion.
Without these two objects,
our program would not be an app.
Since we passed
nil
as the third argument of
UIApplicationMain,
the application object will be of Apple’s class
UIApplication.
Since we passed the string
@"HelloAppDelegate"
as the fourth argument of
UIApplicationMain,
the application delegate object will be of our class
HelloAppDelegate.
Importing the header file
/Applications/Xcode.app/Contents/Developer/Platforms/iPhoneOS.platform/Developer/
SDKs/iPhoneOS7.0.sdk/System/Library/Frameworks/UIKit.framework/Headers/UIKit.h
allows
main.mUIApplicationMain
that are specific to the iPhone world.
Similarly,
importing the header file
View.h
allows
HelloAppDelegate.m
to mention the word
View.
The application object performs the tasks that any app would have to do. The application delegate object performs the tasks that only your app has to do.
The application object receives touches from the user’s fingers and shakes from the user’s hands, and sends them to the window object (see below). In return, it receives from the window object any messages that the window object and its enclosed views decide not to handle. We can therefore think of the application object as the last responder to these messages. It also receives messages from control objects (see below) and passes them along to the target objects (the interested parties).
The
application
object has already been written for us
(i.e., class
UIApplication
has already been written).
You will have to write the
application
delegate
(i.e., you have to write a
subclass
of
NSObject
<UIApplication
Delegate>
).
The object of this subclass will play music,
draw pictures, read and write files, talk to the GPS, etc.
If the user presses the iPhone’s Home button,
someone will send the
applicationWillResignActive:
and
applicationDidEnterBackground:
messages to the
application
delegate.
The
application delegate
begins executing with a call to its
applicationDidFinishLaunchingWithOptions:
method
(or, in older versions, its
applicationDidFinishLaunching:
method).
To see what the
application delegate
does,
start reading at this method.
Since we named the project
Hello
(with a class prefix of
Hello),
it contains a class named
HelloAppDelegate
written in a pair of files named
HelloAppDelegate.h
and
HelloAppDelegate.m.
Since we made this an empty application,
class
HelloAppDelegate
already contains a property named
window
that is a (pointer to a)
UIWindow
object.
And although we don’t see them here in the file
HelloAppDelegate.h,
a
HelloAppDelegate
object also inherits whatever instance variables and properties
are present in an
NSObject
object.
In addition to inheriting the methods of an
NSObject,
the
HelloAppDelegate
has also inherited the obligations
of an
UIApplicationDelegate.
One of these obligations is to have an
applicationDidFinishLaunchingWithOptions:
method.
We have to write this method because someone will send the
applicationDidFinishLaunchingWithOptions:
message to the application delegate object
when the application object has finished being launched.
Similarly,
someone will send the
applicationWillResignActive:
and
applicationDidEnterBackground:
messages to the
HelloAppDelegate
if the user presses the iPhone’s Home button.
Our
applicationDidFinishLaunchingWithOptions:
method sends the
makeKeyAndVisible
message to the application delegate’s
window.
The key window is the one that receives the user’s touches.
We also want the window to be
visible
(i.e., not hidden by other windows).
The
@property
creates the instance variable
_window,
which the application delegate refers to as
self.window.
The screen object is the only screen object there is—it’s a “singleton” object. We have to get in touch with this object because it is the only object that knows the dimensions of the iPhone screen. Do not hard code (write) the dimensions into your app. Get the dimensions from the main screen object because they will be different on each device: 320 × 480 pixels on the original iPhone, 320 × 480 pairs of pixels (i.e., 640 × 960 pixels) on an iPhone 4, 320 × 568 pairs of pixels (i.e., 640 × 1136) on iPhone 5, 1024 × 768 pixels on an iPad, etc.
For the iPhone 5 numbers,
the Pythagorean Theorem
yields a diagonal of
√6402
+ 11362
=
16√402
+ 712
≅
1303.878
pixels.
The iPhone 5 screen has
326 pixels per inch.
(The original iPhone had 163 per inch.)
Therefore the iPhone 5 diagonal is
| √6402 + 11362 | ≅ 3.99962 |
| 326 |
The main screen also knows how much of this screen space is available
for the application.
The main screen gives us two
rectangles,
named
bounds
and
applicationFrame
in the
application:didFinishLaunchingWithOptions:
method of class
HelloAppDelegate.
bounds
is the size of the screen.
applicationFrame
is the size of the part of the screen that is available for the app.
applicationFrame
will be the same size as
bounds
if the status bar is hidden.
(The status bar is the thing that displays the current time
at the top of the screen.)
applicationFrame
will be smaller than
bounds
if the status bar is visible.
For the time being,
our status bar is visible.
See the
statusBarHidden
property of class
UIApplication,
and the
UIStatusBarHidden
key that you could put in the
Hello-Info.plist
An app has only one screen, but it could have more than one window. At any given time, however, only one window will be visible on the screen. There’s only so much you can do with 640 × 1136 pixels.
A
window
can contain many
views
(the
subviews).
Our window will contain one view of class
View,
which is a subclass of
UIView.
Every
UIView
has a
backgroundColor
property.
This app puts a specialized view in a generic window
(a hand-crafted
View
in an off-the-shelf
UIWindow).
Another approach would have been
to omit the specialized view class
and to write the
drawRect:
in a specialized window class.
But a window is already very specialized,
with responsibility for passing messages from the application delegate
to the views inside the window.
We will let the window concentrate on the things
that no other class of view can do.
Class
UIWindow
is derived from class
UIView,
which is derived from class
UIResponder,
which is derived from class
NSObject.
Class
UIWindow
inherits its
initWithFrame:
and
addSubview:
methods from class
UIView.
That’s why the documentation links for these methods
go to the page for class
UIView.
Similarly, classes
UIWindow
and
UIView
inherit their
alloc
method from class
NSObject.
A view is a rectangular area of pixels that can be made visible and usually is. A big view can contain smaller views inside it. The smaller views are the subviews of the big view, and the big view is the superview of the smaller views. Each subview can have subviews of its own. The views are therefore organized into a family tree.
There are many specialized types of view
(i.e.,
subclasses of class
UIView).
Some views are
controls:
buttons,
switches,
sliders,
etc.
Another type of view is a
window,
the kind of view that must be at the
root
(top) of the tree.
An app may have many views,
but usually only one of them will be a window.
Even if the app has more than one window,
only one window (and its subviews) will be visible at a time.
Every view must be contained in a larger superview,
except for the window.
The window does not need to be contained in a superview.
Another difference between a
window
and other
views
is that a
window
can receive a touch from the
application
object and pass them onto the
first responder
for the touch
(the subview that was hit).
See
Apple’s
documentation
about windows and views.
The screen object is totally different from the views and window. The screen is not a rectangular area of pixels. It has no foreground or background colors, and is never displayed to the user. The screen is merely a source of numbers. It is the only object that knows the total width and height in pixels available to the app (320 × 568 pairs of pixels on an iPhone 5 if the status bar is invisible, 320 × 548 pairs if the status bar is visible, etc). An app has only one screen object.
The
#import <UIKit/UIKit.h>
in
HelloAppDelegate.h
tells the computer that
UIWindow
is the name of a class.
The
@class View
tells the computer that
View
is the name of a class.
I chose
yellowColor
because yellow is unlikely to be any default.
If we see yellow,
it’s because we asked for it.
Never attempt to send the message
drawRect:
directly to a
view;
i.e., never attempt to call the method
drawRect:
directly.
(To get it to work,
we would first have to set up a
graphics context
and other horrible stuff.)
If the
view
needs to be redrawn,
send it the message
setNeedsDisplay.
The point is a structure;
the variable
point
contains a
CGPoint
structure.
The string and font are objects;
the variables
string
and
font
contain the addresses of the objects,
not the objects themselves.
To display multiple lines of text,
this example
will use a specialized view called a
UITextView.
When you pres the Xcode run button, it may say “Stop "Hello"? "Hello" is already running. Click Stop to terminate and launch a new instance.”. Go ahead and press the Stop button.
If Xcode says “The Simulator can’t be launched because it is already in use”, press OK and quit the iPhone Simulator. The press the Xcode run button again.
I created
Hello.zip
with a version of the SDK that might have been different
from your version.
If Xcode says “Base SDK Missing”
or otherwise rejects my .zip files, do this:
Hello
project at the top of the Xcode Project Navigator.
I created the
Hello.zip
by running the following Bash shellscript on my Mac
in the directory that held the
Hello
folder (my Desktop).
#!/bin/bash
#The name of this shellscript is makezip.

zip -r $1.zip $1 -x $1/build/*
cd ~/Desktop
pwd
./makezip Hello
ls -l Hello.zip
drawRect:
method of class
View,
try a different font size:
6,
72,
or even an expression such as
2.5 * 72.drawRect:
into a single statement.
	[@"Hello, World!"
		drawAtPoint: CGPointMake(0.0, 0.0)
		withAttributes: [NSDictionary
			dictionaryWithObject: [UIFont systemFontOfSize: 32.0]
			forKey: NSFontAttributeName
		]
	];
Is the statement too long to read comfortably? Change it back.
drawRect:
method of class
View
put the coördinates
point
by saying
CGPoint point = CGPointMake(0, 0);Can you do the same thing with the constant structure
CGPointZero?
CGPoint point = CGPointZero;See also
CGSizeZero
and
CGRectZero.
sizeWithAttributes:sizeWithFont:
in iOS 6)
of class
NSString
returns a
structure
giving the width and height in pixels of the string of characters in the given
font.
The method
drawRect:
can use these dimensions to center the string in the
View.
The
structure
self.bounds.origin
is a
CGPoint
containing the coördinates of the upper left corner of the
view.
It defaults to
self.bounds.origin
is not
self.bounds.origin
to the sums that we store in
x
and
y.
	CGSize size = [string sizeWithAttributes: attributes];
	CGFloat x = self.bounds.origin.x + (self.bounds.size.width - size.width) / 2;
	CGFloat y = self.bounds.origin.y + (self.bounds.size.height - size.height) / 2;
	CGPoint point = CGPointMake(x, y);
	[string drawAtPoint: point withFont: font];
We can consolidate the repetition by introducing a new variable
b:
	CGSize size = [string sizeWithAttributes: attributes];
	CGRect b = self.bounds;
	CGFloat x = b.origin.x + (b.size.width - size.width) / 2;
	CGFloat y = b.origin.y + (b.size.height - size.height) / 2;
	CGPoint point = CGPointMake(x, y);
	[string drawAtPoint: point withFont: font];
To be formal,
we say that the coördinates of the center are
(self.bounds.size.width / 2, self.bounds.size.height / 2).
If we’re writing text in the upper left corner of the
view,
it’s convenient that the coördinates of the corner are
The coördinates of the upper left corner of the
view
would become
(-self.bounds.size.width / 2, -self.bounds.size.height / 2).CGRectMake.
Insert the following statements
into the
initWithFrame:
method of class
View
immediately after setting the
background
color.
		//Keep the size of the view the same,
		//but move the origin to the center of the view.
		CGFloat w = self.bounds.size.width;
		CGFloat h = self.bounds.size.height;
		self.bounds = CGRectMake(-w / 2, -h / 2, w, h);
Now that the origin is in the center of the view, the code that creates
point
in
drawRect:
can be simplified as follows.
The text will remain centered.
	CGSize size = [s sizeWithAttributes: attributes];
	CGPoint point = CGPointMake(-size.width / 2, -size.height / 2);
@"Hello, World!"
to a string in a foreign character set.
NSString *string = @"هزا مدهش"; //That's amazing!Click on a point within the double quotes, and then
Edit → Special Characters…

View → All Characters

Middle Eastern Scripts → Arabic

Insert
drawRect:
put something more useful into
s.
How about one of the properties of the device?
	UIDevice *device = [UIDevice currentDevice];	//There is only one object of this class.

	NSString *string = device.model;		//Is it an iPhone, iPod, iPad--or a simulator?
	NSString *string = [device.identifierForVendor UUIDString];	//serial number
	NSString *string = device.systemName;		//name of operating system, e.g. "iPhone OS"
	NSString *string = device.systemVersion;	//version number of operating system, e.g., "7.0.3"
drawRect:
print the current date.
See the no-argument
init
method of class
Date
in the
Class
example.
drawRect:
put the current price of IBM stock into the string.
Change
NSString *string = @"Hello, World!";to the following. The format
sl1t1
is the concatenation of
s
(lowercase S),
l1
(lowercase L one),
t1
(lowercase T one).
See the list of
Yahoo formats.
	NSURL *url = [[NSURL alloc] initWithString:
		@"http://finance.yahoo.com/d/quotes.csv?s=IBM&f=sl1t1"];

	NSError *error;
	NSString *string = [[NSString alloc]
		initWithContentsOfURL: url
		encoding: NSUTF8StringEncoding
		error: &error
	];

	if (string == nil) {
		string = [error localizedDescription];
	}
"IBM",186.37,"4:01pm"
systemFontOfSize:
of class
UIFont,
try the others:
boldSystemFontOfSize:,
italicSystemFontOfSize:.
backgroundColor.
Instead of calling a method such as
yellowColor
or
whiteColor,
mix your own color by calling the class method
colorWithRed:green:blue:alpha:UIColor.
The alpha level is the amount of opacity:
0.0 for transparent, 1.0 for opaque.
self.backgroundColor = [UIColor colorWithRed: 1.0 green: 0.4 blue: 0.2 alpha: 1.0];
FF0000 for red,
FF00FF for purple,
808080 for gray.
View.m
immediately after the
#import.
/*
Bits 16 to 23 inclusive of the color represent the amount of red in the color.
Change these bits to a fraction in the range 0 to 1 inclusive.
Similarly, bits 8 to 15 inclusive represent the amount of green;
bits 0 to 7 inclusive represent the amount of blue.
*/

#define RED(color)	(((color) >> 2*8 & 0xFF) / 255.0)
#define GREEN(color)	(((color) >> 1*8 & 0xFF) / 255.0)
#define BLUE(color)	(((color) >> 0*8 & 0xFF) / 255.0)
You can then specify the background color as follows.
	unsigned color = 0xFF00FF;	//purple
	self.backgroundColor = [UIColor colorWithRed: RED(color) green: GREEN(color) blue: BLUE(color) alpha: 1.0];
drawRect:.
	UIColor *color = [UIColor redColor];

	NSDictionary *attributes = [NSDictionary dictionaryWithObjectsAndKeys:
		color, NSForegroundColorAttributeName,
		font,  NSFontAttributeName,
		nil
	];
In iOS 6 and older, insert the following statements at the start of
drawRect:
immediately before the statement that creates
point.
The empty parentheses call the function
UIGraphicsGetCurrentContext
without passing any arguments to it.
	CGContextRef c = UIGraphicsGetCurrentContext();
	CGContextSetRGBFillColor(c, 1.0, 0.0, 0.0, 1.0); //red, green, blue, alpha
You can combine the above statements to
CGContextSetRGBFillColor(UIGraphicsGetCurrentContext(), 0, .5, 1.0, 1.0);Can you print two messages on two different lines in two different colors?
View?
In the
drawRect:
method of class
View,
print the four numbers in the
self.bounds
property that the
View
inherits from its base class
UIView.
A
CGFloat
is printed with the
%g
format.
	NSLog(@"drawRect: self.bounds.origin == (%g, %g), self.bounds.size == %g × %g",
		self.bounds.origin.x,
		self.bounds.origin.y,
		self.bounds.size.width,
		self.bounds.size.height);
To see the output in Xcode,
View → Debug Area → Activate Console
and press Run.
You may have to press the three little buttons
in the upper right corner of the Debug Area.
If your app is already on the iPhone, in the
Window →
Organizer → Devices → Console
window of Xcode,
look for the <Warning> lines.
Better yet, print the numbers on the iPhone screen.
Change the
NSString
in
drawRect:
to the following.
It uses the
stringWithFormat:
method we saw in the
description
method of class
Date.
	NSString *string = [NSString stringWithFormat:
		@"drawRect: self.bounds.origin == (%g, %g), self.bounds.size == %g × %g",
		self.bounds.origin.x,
		self.bounds.origin.y,
		self.bounds.size.width,
		self.bounds.size.height];
Even better, write a
description
method for class
View,
just like the
description
method of class
Date.
It should return a string containing the four numbers.
Then
drawRect:
can say
NSString *string = [self description];
CGRects
you can print on the screen in
drawRect:
are the
self.frame
method of the
View
(which we will talk about in
Japan),
and the argument of
drawRect:.
If you print information in any other method,
you will have to use the humble
NSLog.
Examples are the two
CGRects
we created in the
application:didFinishLaunchingWithOptions:
method of the
application delegate.
screen
in the
application:didFinishLaunchingWithOptions:HelloAppDelegate.
The property
statusBarHidden
is a
BOOL.
Its value is either
YES
or
NO.
application.statusBarHidden = YES;Press Run again. This time, the
applicationFrame
should be just as tall as
bounds.
application:didFinishLaunchingWithOptions: applicationFrame.origin == (0, 0), applicationFrame.size == 320 × 480
UIStatusBarHidden
property to
YES
in the
Hello-Info.plist
file.
First, get rid of the
statusBarHidden
statement that you just added.
Then
Hello,
and select
Hello-Info.plist.YES.
NSLog(@"applicationWillResignActive:");at the start of the
applicationWillResignActive:
method of the application delegate.
Insert a similar message into each method below it in the
HelloAppDelegate.m
file.
Then launch the app, press the iPhone Home button,
and launch the app again.
Which methods are called when, and in what order?
applicationWillEnterForeground://Trigger another call to drawRect:. [view setNeedsDisplay];
string,
point,
and
attributes
every time we call
drawRect:.
Create them once and for all by letting them be instance variables of
View.
View.
	//in the file View.h, inside the curly braces
	NSString *string;
	CGPoint point;
	NSDictionary *attributes;
initWithFrame:
now has to assign values to four instance variables of
self.
The first one needs the word
self
because it was inherited from the superclass of
View.
		self.backgroundColor = [UIColor whiteColor];
		string = @"Hello, World!";	//not a property, doesn't need self
		point = CGPointZero;

		attributes = [NSDictionary
			dictionaryWithObject: [UIFont systemFontOfSize: 32.0]
			forKey: NSFontAttributeName
		];
application:didFinishLaunchingWithOptions:
pass four arguments (plus the frame) to a new method of class
View
named
initWithFrame:string:backgroundColor:point:font:.
View.h
just before the
@end.
- (id) initWithFrame: (CGRect) frame
	string: (NSString *) s
	backgroundColor: (UIColor *) c
	point: (CGPoint) p
	font: (UIFont *) f;
View.m.
- (id) initWithFrame: (CGRect) frame
	string: (NSString *) s
	backgroundColor: (UIColor *) c
	point: (CGPoint) p
	font: (UIFont *) f {

	self = [super initWithFrame: frame];
	if (self != nil) {
		self.backgroundColor = c;
		string = s;
		point = p;

		attributes = [NSDictionary
			dictionaryWithObject: f
			forKey: NSFontAttributeName
		];
	}
	return self;
}
HelloAppDelegate.m.
	view = [[View alloc]
		initWithFrame: applicationFrame
		string: @"HelloWorld!"
		backgroundColor: [UIColor whiteColor]
		point: CGPointZero
		font:  [UIFont systemFontOfSize: 32.0]
	];
initWithFrame:
method of class
View
is no longer called,
get rid of it.